

Objectives |
As a result of this lesson, students will be able to:
· Assess, revise, and adjust their work throughout the process · Develop skills in using art elements and design principles to create works of art
· Evaluate works of art using art vocabulary and established criteria |
Discussion Question(s) |
|
Materials Needed |
· Assorted materials, such as: plastic bottles, old jeans, newspapers, coat hangers, plastic containers, yarn, pie tins, old jewelry, aluminum foil, cardboard boxes, cans, bottle caps, wood scraps, scrap papers, old CDs, buttons
· Print materials (like magazines, newspapers, and comic books) · Variety of 2-D material (like fabric, felt, construction paper, etc.)
Internet videos about recycling: · “Recyclying ROCKS,” Facts to encourage recycling, 4:31 min. http://www.metacafe.com/watch/yt-kWMPNiEzAkw/recycling_rocks/ (September 24, 2009)
· “Life water Recycled Art - Beachdown Festival,” Sculpture created form used water bottles, 4:09 min. http://www.youtube.com/watch?v=WbRiHN3zjHk (September 24, 2009) · “Recycled Tote Bags, Sustainable Clothing, Art, Threadbanger,” 6:59 min. http://www.metacafe.com/watch/yt-GXR67U142Zs/recycled_tote_bags_sustainable_clothing_art_threadbanger/ (September 24, 2009) |
Set Up and Introduction |
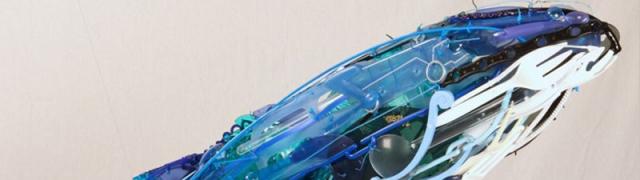
· Discuss how the sculpture was made and which materials were used. · Ask students to look for recyclable materials at home to bring in to class. 2 extra credit points for each object may be given. · Review recycling facts (in the Power Point presentation) which can be posted throughout the room. |
Procedure |
1. Discuss assemblage sculpture. (Definition: Assemblage is an artistic process in which a three-dimensional artistic composition is made by putting together found objects.) Optional: Show Internet videos on recycling and art, such as those listed above. 2. Discuss combine painting (term employed for assemblage techniques in connection with painting in which found objects are incorporated into the painting surface). 3. Show PowerPoint on Recycling and Marcos Cordoso and Deneir Martins. 4. Distribute Info Sheet, and discuss. 5. Students create rough sketches for creature sculptures labeling places where they plan to use various materials. 6. Conduct demonstration of tool safety. 7. Once sketches are discussed with teacher, students construct a creature or combine painting from collected materials. 8. Trouble shooting mid-project discussion: As a class, discuss any problems students may be facing and brainstorm solutions. 9. Once the sculptures or paintings are completed, students complete a written evaluation considering process, characteristics, quality, difficulties, and solutions found. Extending the lesson: · Create a mobile creature, that is, the creature must move in some way. · If students finish early, they may create a quilt square in the style of Marcos Cordoso. Teacher can assemble the squares to create a collaborative artwork. · Students may create one of each project option if time allows. |
Assessment and Wrap Up |
· On the project evaluation, students evaluate their individual performance. · Students can present their work to the class sharing some of the information from their project evaluation. |
Recycled Art: Creature Sculptures and Combine Paintings
Create a Recycled Creature Sculpture
Step 1: Gather your Materials
Gather recycled materials from home and from the collection boxes of our recycling drive. Think about extra materials you may need to attach, fasten, and decorate your creature.
Step 2: Create your Sketch
Think about what type of creature you want to make. Create a sketch. Lay out collected objects and map out how you will use them. Label each object on your sketch.
Step 3: Construct your Creature
After the tool safety demonstration, begin cutting and assembling the materials to create your sculpture. Remember to measure and to use a cutting board. If you are having difficulty making something work, don’t hesitate to ask for help. THIS IS NOT EASY! Once your creature is assembled, add final details with paint, marker, yarn, buttons, etc.
Create a Combine Painting
Step 1: Gather your Materials
What are the images that make up your world? Select photos, shirts, personal objects that you find meaningful. Then clip the images that relate to your found objects from magazines, newspapers, etc. Gather additional 2-dimensional materials, like scraps of wallpaper, colored paper, etc. Finally find a cardboard piece to use as a base. Tip: If you don’t want to damage your photographs, I can photocopy them instead.
Step 2: Compose your Image
Think about whether you want a vertical or horizontal composition. Begin laying out your objects, images, and materials. (Cut out the images as needed.) Let your ideas develop as you arrange your images. Consider using some recycled 3-D objects to extend some of the flat surfaces. Once you’re happy with the composition, glue down your elements.
Step 3: Paint the Image
Choose or mix paint colors that will contrast with or unify the elements in your composition. On a separate piece of paper, experiment with a variety of techniques. Try applying paint in thin layers, thick layers, fluid strokes, dry brush, drips, etc. When you’re ready to paint, begin with broad, bold strokes, then go in with smaller strokes. Consider letting some of the cardboard base show through. Remember, brushstrokes can define the edges of an image, break the image, and create movement and visual rhythm. Tip: You only need a few bright colors to create a dramatic image. Don’t over mix or overwork your paint.